 214-904-9400


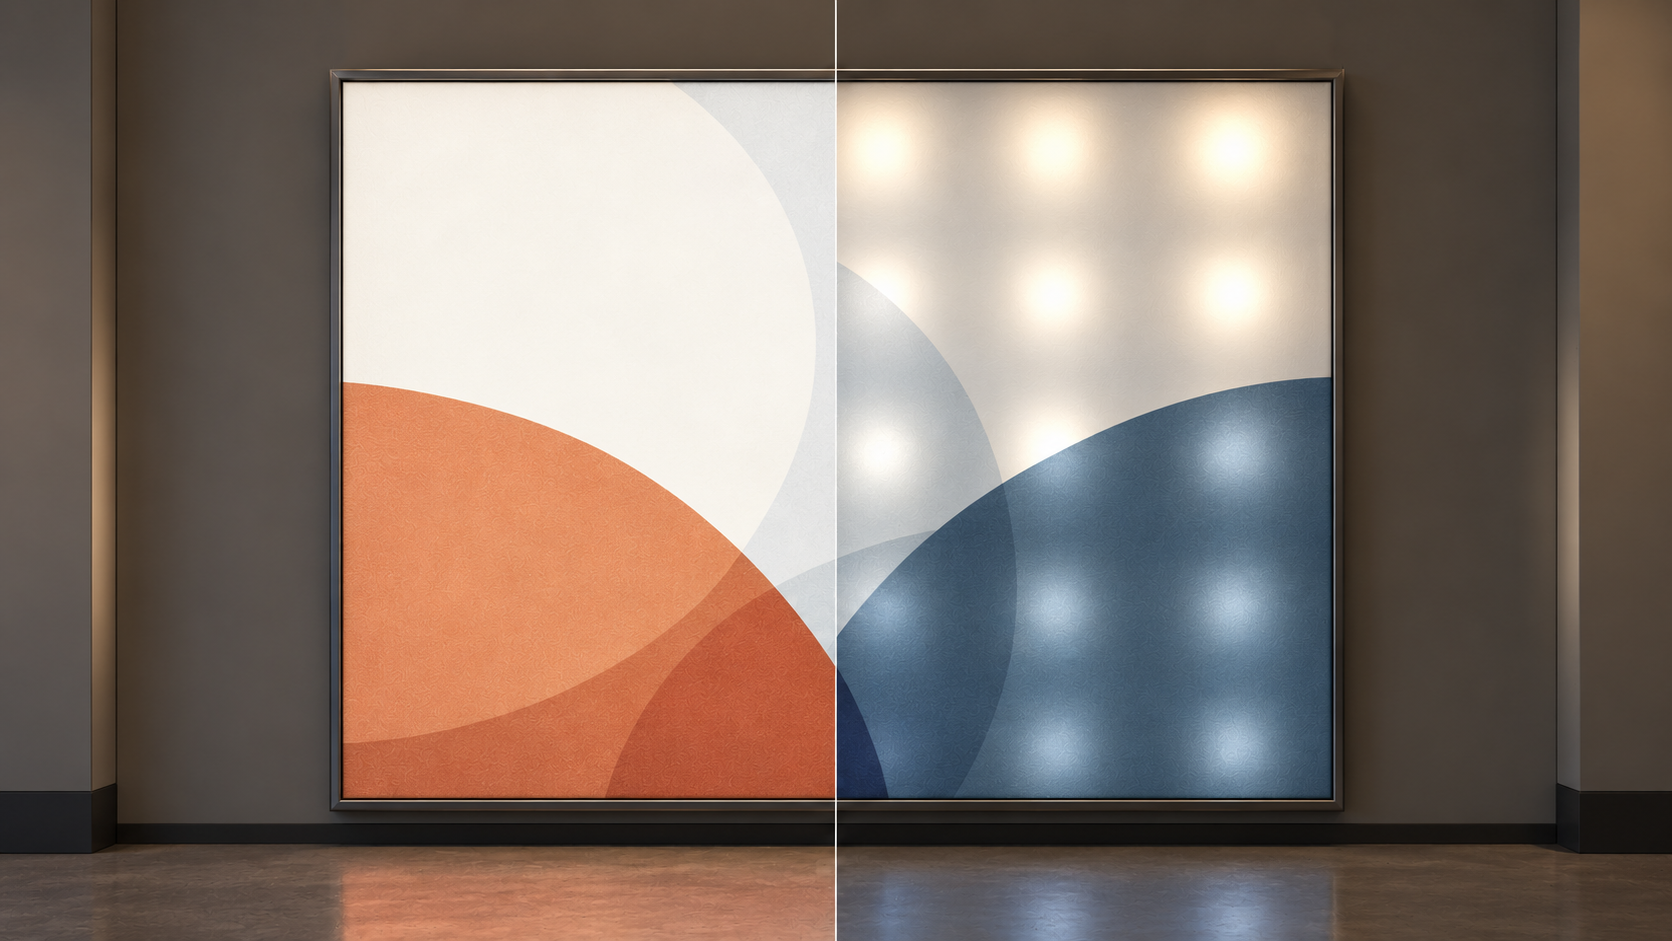
Stand in front of two backlit signs sometime, really look at them. One glows evenly across its entire surface, smooth and consistent, almost like the light is coming from everywhere at once. The other one is technically lit too, you can tell there’s a light source behind it, but you can see bright spots where the bulbs or LEDs sit and darker patches in between. Both signs have a light behind them. Only one of them is actually backlit the way it’s supposed to look.
The difference isn’t the lighting fixture. It’s almost entirely about diffusion, and diffusion is a physics problem most people never think about until they’re standing in front of a sign that got it wrong.
The Basic Setup, and Where It Goes Wrong
A backlit sign is built from three basic layers: a light source, typically LED modules mounted inside a frame or cabinet, an air gap that spreads that light out before it reaches the front, and a translucent face material that the light passes through on its way to the viewer. The entire visual effect depends on that light becoming even and uniform by the time it reaches the front surface, rather than arriving as a cluster of distinct bright points.
The air gap matters more than people expect. If the LEDs sit too close to the face material, the light hasn’t had enough distance to spread and blend before it hits the surface, and you get exactly what shows up in a badly built backlit sign: bright circles directly above each LED module, with visibly darker gaps in between. This is called hotspotting, and it’s one of the most common mistakes in backlit sign production, almost always caused by trying to make a cabinet too thin.
The Material Is Doing More Work Than People Realize
Here’s the part that surprises people: the face material itself is responsible for most of the actual diffusion, not just the depth of the cabinet. A material’s light transmission rate, essentially how much light passes through it versus how much gets scattered or blocked, determines both how bright the sign appears and how evenly that light spreads across the surface.
Materials built specifically for backlighting are engineered with this in mind. SEG fabric designed for backlit displays has a different weave and coating than standard print fabric, built to scatter light evenly rather than let it pass through in a direct, undiffused beam. Opal acrylic and backlit-rated vinyl work similarly, using a translucent white base that breaks up the light before it reaches the printed surface. Standard printed vinyl or fabric that wasn’t built for this purpose often lets too much light through directly, which is exactly how you end up with visible hotspots regardless of how well the cabinet was built.
Quick Reference: Materials Built for Backlighting vs. Standard Materials
|
|
Backlit-Rated Material |
Standard Printed Material |
|
Light diffusion |
Engineered to scatter light evenly |
Minimal diffusion, light passes directly through |
|
Appearance when lit |
Smooth, even glow across the surface |
Visible hotspots above each LED |
|
Typical use |
Light boxes, backlit trade show walls, illuminated signage |
Standard banners, non-illuminated displays |
|
Color behavior under light |
Predictable, tested for backlit color shift |
Can shift unpredictably when backlit |
Edge-Lit vs. Direct-Lit: Two Different Approaches to the Same Problem
There are actually two fundamentally different ways to build a backlit sign, and they solve the hotspotting problem in opposite ways. Direct-lit systems place LED modules in a grid directly behind the face material, relying on an air gap and diffusion to even out the light, which is the setup described above and the one most prone to hotspotting if the gap or material is wrong.
Edge-lit systems take a completely different approach. LEDs are mounted only along the edges of a clear acrylic panel, and the light travels sideways through the panel itself, guided by tiny etched patterns or a specialty coating that gradually scatters the light forward and out through the face. Done well, edge-lit systems produce extremely even illumination with a much thinner overall cabinet than direct-lit designs can achieve, which is why edge-lit light boxes have become popular for slim retail signage and architectural displays where cabinet depth is tightly limited. The tradeoff is that edge-lit systems generally cost more to produce and have more size limitations than a direct-lit cabinet, which can scale up more easily for larger installations.
Color Doesn’t Behave the Same Way When Light Comes From Behind
Printed color and backlit color are not the same thing, even using the exact same ink on the exact same file. When light reflects off a standard printed surface, as it does on a normal banner viewed under room lighting, the color you see is the light that bounces back after the surface absorbs the rest. When light passes through a translucent surface from behind, the color behaves more like stained glass, dark and saturated colors block more light and can appear murky or almost black, while lighter colors let more light through and can appear brighter and slightly washed out compared to how they looked on a non-backlit proof.
This is why a design that looks perfectly color-balanced on a standard printed proof can look noticeably different once it’s actually backlit. Dark navy logos can read as nearly black. Pastel colors can blow out brighter than expected. Getting this right requires either testing the actual artwork on a backlit sample, or working with a print partner who already knows how specific colors shift under backlighting and can adjust the file before it ever gets produced.
Heat Is the Problem Nobody Mentions
LED modules generate heat, and a backlit cabinet is, by design, an enclosed space. Without adequate ventilation, that heat builds up inside the cabinet over time, which can shorten the lifespan of the LEDs, cause uneven light output as components age unevenly, and in some cases affect the adhesive or material inside the cabinet over years of use. Well-built backlit displays account for airflow and heat dissipation as part of the cabinet design, not as an afterthought once the sign is already installed and running warm.
This matters most for displays that stay lit for long stretches, storefront signage left on from open to close, or trade show walls running continuously across a multi-day event. A cabinet with proper venting or small fans built into the frame will hold its color and brightness consistency far longer than a sealed box that was designed purely around how it looks on day one.
A Quick Checklist for Getting Backlit Signage Right
- Confirm adequate air gap between the LED source and the face material to avoid hotspotting
- Use a material specifically rated for backlighting, not standard printed vinyl or fabric
- Test or preview how your actual colors shift when lit from behind, not just under normal light
- Plan for heat dissipation and ventilation inside the light box, especially for displays left on for long hours
- Ask your print partner for a backlit sample before committing to final colors on a large installation
Why This Matters More Than It Seems
Backlit signage costs more than standard printed graphics, both in materials and in the hardware behind it, which makes it one of the worst places to get the physics wrong. A hotspotted sign or a logo that reads muddy once it’s lit doesn’t just look unfinished, it undercuts the entire reason someone chose backlit in the first place: to look sharp, modern, and intentional.
If you’re planning a backlit install, trade show wall, light box, or illuminated storefront sign, XL Digital can walk through the material and color considerations with you before production, which is exactly the stage where these problems are cheap to fix and painful to fix after the fact.